
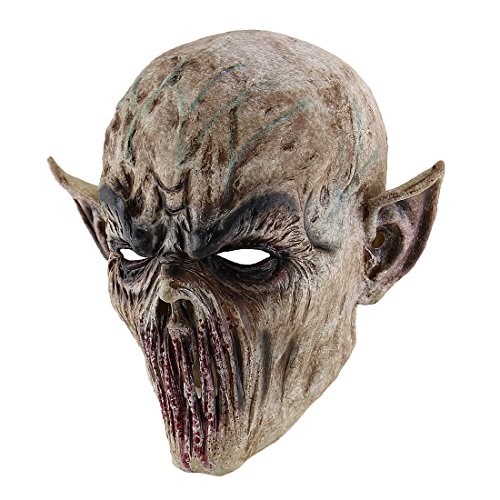
Halloween masks are an essential part of many costumes, but they can sometimes encounter issues that require fixing. Common problems with Halloween masks include torn or ripped material, broken or loose elastic straps, peeling or flaking paint, and cracked or damaged structures. Addressing these issues can help ensure that your mask is in perfect condition for your Halloween festivities.
To fix these issues, you will need a few tools and materials such as scissors, glue or adhesive, paint and brushes, elastic straps, and possibly some additional materials depending on the specific problem you are facing. Having these items on hand will make the mask repair process much easier.
In this step-by-step guide, we will walk you through the process of fixing common Halloween mask issues. We will cover repairing a torn or ripped mask, fixing a broken or loose elastic strap, touching up peeling or flaking paint, and repairing a cracked or damaged structure. Following these steps will allow you to restore your mask to its former glory and ensure that it is ready for the Halloween season.
In addition to fixing specific issues, it is important to know how to maintain your Halloween masks properly. Taking care of your masks by storing them correctly, keeping them clean, and avoiding excessive wear and tear can extend their lifespan and ensure they are ready for future Halloween celebrations. By following our tips for maintaining Halloween masks, you can continue to enjoy them for years to come.
Key takeaways:
- Repairing torn or ripped masks: Use appropriate materials and techniques to fix any tears or rips in your Halloween mask, ensuring it looks as good as new.
- Fixing broken or loose elastic straps: Learn how to repair or replace elastic straps on your Halloween mask to ensure a secure and comfortable fit.
- Touching up peeling or flaking paint: Follow a step-by-step guide to touch up any peeling or flaking paint on your Halloween mask, restoring its original appearance.
Common Issues with Halloween Masks
Having trouble with your Halloween mask? Don’t worry, we’ve got you covered! In this section, we will address some common issues that you might encounter with your spooky disguise. From torn or ripped masks to broken elastic straps, peeling paint, and even cracked structures, we’ll dive into the solutions for these frustrating problems. Get ready to fix those Halloween mask woes and ensure a truly spooktacular experience!
Torn or Ripped Mask
Halloween masks have been part of Halloween celebrations for centuries. The tradition dates back to ancient Celtic festivals, where masks were believed to protect against evil spirits. Masks evolved over time, made from various materials like animal skins, clay, and later rubber and latex. Despite advancements in mask materials, torn or ripped masks continue to be a common issue. To repair a torn or ripped mask, follow these steps:
1. Inspect the mask for tears or rips.
2. Identify the size and location of the tear or rip.


3. Gently clean the area around the tear or rip using mild soap and water.
4. Allow the area to dry completely.
5. Use a strong adhesive designed for fabric or latex repair.
6. Apply adhesive to both sides of the tear or rip.
7. Press the two sides together firmly and hold for a few minutes.


8. For added support, reinforce the repair with fabric or adhesive tape on the inside.
9. Let the adhesive cure completely as instructed by the manufacturer before using the mask again.
10. Regularly inspect the mask for new tears or rips and promptly repair them.
11. Store the mask in a safe and dry place to prevent unnecessary wear and tear.
By following these steps, you can easily repair your torn or ripped mask and continue enjoying the spooky festivities.
Broken or Loose Elastic Strap
Inspect the elastic strap for tears, breaks, or if it is loose. If the elastic strap is loose, determine if it can be tightened or replaced. Ensure that the elastic strap securely holds the mask in place without slipping. Mend any tears or breaks in the elastic strap using a sewing needle and thread. If the elastic strap is too loose, cut a new elastic strap to the desired length. Securely sew the ends of the new elastic strap onto the mask for a snug fit. Test the mask by wearing it and moving your head to ensure that the elastic strap holds it securely. To prevent future issues, regularly check the mask for wear and tear and store it in a safe and dry place. Properly maintaining the elastic strap will keep your Halloween mask in place and enhance your costume throughout the festivities.
Peeling or Flaking Paint
Peeling or flaking paint on a Halloween mask can be easily fixed by following a few simple steps.
First and foremost, it is important to carefully remove any loose or peeling paint from the mask using a soft brush or cloth.
Once that is done, the next step is to clean the mask thoroughly with mild soap and water in order to remove any dirt or debris that may be present.
Once the mask is completely clean and dry, the next step is to apply a primer that is suitable for the material of the mask, as this will help the paint adhere better.
After selecting a paint color, a thin and even coat should be applied to the affected area using either a small brush or a sponge.
It is crucial to allow the paint to dry completely before deciding if additional coats are necessary.
To ensure long-lasting results and to prevent any future peeling or flaking, it is advisable to seal the paint with a clear sealant or varnish.
By diligently following these steps, not only will the appearance of the mask be restored, but it will also safeguard against any potential peeling or flaking in the future.
It is worth mentioning that the specific process may vary depending on the material and type of the mask.
Cracked or Damaged Structure
To address a cracked or damaged structure of a Halloween mask, it is important to follow these steps:
1. Assess the damage: It is essential to thoroughly examine the mask to determine the extent of the cracks or damage. This includes identifying whether they are surface cracks or if there are structural issues present.
2. Apply adhesive: In the case of surface cracks, opt for a strong adhesive such as super glue or epoxy resin. Apply a small amount of the adhesive to both sides of the crack and firmly press them together. Hold the mask until the adhesive sets.
3. Reinforce the structure: If the damage is severe and impacting the mask’s structure, extra materials like wire, craft foam, or fiberglass should be utilized to strengthen weakened areas.
4. Seal and repaint: Once the repairs have been completed, it is recommended to seal the cracks and damaged areas with clear sealant or paint. This step is crucial to enhancing durability and preventing further damage.
5. Reinforce weak spots: It is important to identify any weak spots in the mask and add additional adhesive or reinforcement materials to prevent potential future damage.
It is crucial to handle the mask with care, particularly avoiding exerting excessive pressure on the repaired areas. By following these steps, you can ensure that your Halloween mask is prepared for another spooky season.
Tools and Materials Needed
To fix a Halloween mask, you will need the following tools and materials:
– Scissors: These will help you trim and cut any excess material on the mask.
– Glue: It is essential for securing any loose parts or attaching new components to the mask.
– Elastic bands: These are necessary to keep the mask in place, ensuring a comfortable fit.
– Paint: You can use acrylic or fabric paint to touch up or customize the appearance of the mask.
– Paintbrushes: It is important to have different sizes of paintbrushes for precise application and detailing.
– Feathers, beads, or other decorative elements: These can be added to enhance the design of the mask.
Pro-tip: Before starting any repairs or modifications, make sure to thoroughly clean the mask to remove any dirt or residue. This will ensure proper adhesion of adhesive and paint, resulting in a longer-lasting fix.
Step-by-Step Guide to Fixing Halloween Masks
Fixing Halloween masks can be a daunting task, but fear not! In this step-by-step guide, we’ve got you covered with expert tips and tricks to revive your favorite spooky disguise. From repairing tears and rips to fixing loose elastic straps, we’ll walk you through each sub-section with practical solutions. Get ready to become a DIY mask magician as we delve into touching up paint, repairing cracked structures, and ensuring your mask is ready to scare the socks off this Halloween!
1. Repairing a Torn or Ripped Mask
To repair a torn or ripped Halloween mask, follow these steps:
1. Assess the damage: Examine the torn area to determine its size and severity.
2. Gather necessary materials: You will need a needle, thread that matches the mask’s color, scissors, and a small patch of fabric that matches the mask.
3. Prepare the mask: Clean the torn area to ensure better adhesion of the patch and remove any loose threads or debris.
4. Position the patch: Cut the patch fabric into a shape that will cover the torn area. Place the patch on the inside of the mask, aligning it with the tear.
5. Sew the patch: Use the needle and thread to stitch along the edges of the tear, securing the patch to the mask. Use a tight and even stitching pattern for a strong repair.
6. Tie off the thread: After stitching the entire tear, securely tie off the thread to prevent unraveling.
7. Trim excess fabric or thread: Use scissors to neatly trim any excess fabric or thread from the repaired area.
8. Test the repair: Put on the mask and gently tug on the repaired area to ensure it holds up well.
9. Enjoy your fixed mask: Your torn or ripped Halloween mask is now ready to be used again!
By following these steps, you can easily repair a torn or ripped Halloween mask without buying a new one.
2. Fixing a Broken or Loose Elastic Strap
To properly fix a broken or loose elastic strap on a Halloween mask, simply follow these steps:
1. Begin by removing the mask.
2. Thoroughly inspect the elastic strap for any signs of damage or looseness.
3. In the event that the strap is broken, carefully cut off the damaged section.
4. Proceed to measure a new piece of elastic strap that is slightly longer than the original.
5. Securely tie one end of the new strap to the existing strap.
6. Next, thread the other end of the new strap through the loop or attachment point.
7. To hold the new strap in place, tie a secure knot.
8. Test the mask’s elasticity and fit by putting it back on.
If you find that the strap is loose, you can easily adjust its tightness by either tying a knot or sewing a small piece of fabric onto the strap. This will provide added tension and improve the overall fit.
By diligently following these steps, you can effortlessly fix any issues with a broken or loose elastic strap on your Halloween mask. It is also important to regularly check and maintain the strap’s condition. Have a wonderful and happy Halloween celebration!
3. Touching Up Peeling or Flaking Paint
3. Touching up peeling or flaking paint on a Halloween mask:
1. Assess the damage: Take a close look at the areas where the paint is peeling or flaking in order to determine the full extent of the damage.
2. Clean the mask: Gently cleanse the mask using mild soap and water to remove any dirt or debris. Make sure to dry the mask completely.
3. Sand the affected area: Utilize fine-grit sandpaper to smooth out the peeling or flaking paint. Be cautious not to harm the mask in the process.
4. Prime the surface: Apply a thin layer of primer to enhance the adhesion of the new paint. Use a brush or sponge to evenly spread the primer, and allow it to completely dry.
5. Match the paint color: Find an acrylic or fabric paint that matches the original color. Test it on a small, inconspicuous area to ensure a proper match.
6. Apply the new paint: Carefully apply the new paint using a small brush or sponge. Begin with a thin layer and let it dry before adding more if needed. Blend the new paint with the surrounding area.
7. Seal the paint: Once the paint has dried, apply a clear sealant or varnish to safeguard it and prevent any future peeling or flaking.
Remember, it is crucial to follow these steps diligently in order to achieve a successful paint touch-up.
4. Repairing Cracked or Damaged Structure
To effectively repair a cracked or damaged structure on a Halloween mask, follow these steps:
1. Assess the damage: Carefully examine the mask to determine the extent of the cracks or damage. Take note of any weak areas that may require reinforcement.
2. Clean the area: Thoroughly clean the damaged region of the mask using mild soap and water. It is important to ensure that the area is completely dry before proceeding.
3. Apply adhesive: Utilize a strong adhesive that is appropriate for the mask’s material to bond the cracked or damaged parts together. Apply the adhesive sparingly and firmly press the pieces together.
4. Hold in place: Use clamps or tape to securely hold the cracked or damaged parts in place while the adhesive dries. It is advisable to follow the recommended drying time provided by the adhesive manufacturer.
5. Reinforce if necessary: If the cracked or damaged area requires additional support, consider using hot glue, epoxy, or fabric patches. These materials will provide extra stability.
6. Smooth and paint: After the adhesive has dried, utilize sandpaper or a file to smooth any rough edges. Following that, touch up the repaired area with matching paint. Allow the paint to dry completely.
7. Final inspection: Carefully inspect the repaired area to ensure a secure bond and a seamless blend with the rest of the mask. Make any necessary adjustments or additional repairs if required.
By following these steps, you can effectively repair a cracked or damaged structure on a Halloween mask and extend its lifespan.
Tips for Maintaining Halloween Masks
Tips for Maintaining Halloween Masks
To keep your Halloween mask in good condition, follow these tips for proper maintenance.
1. Clean regularly: It is important to clean your Halloween mask regularly using mild soap and water. Harsh chemicals or abrasive cleaners should be avoided as they can damage the mask.
2. Proper storage: Store your Halloween mask in a cool and dry place to prevent any damage. Avoid exposing it to direct sunlight or high humidity. You can use a plastic container or a cloth bag to protect it from dust or pests.
3. Handle with care: When wearing or removing your Halloween mask, handle it with care. Avoid pulling or stretching it, especially delicate parts such as feathers or ornaments.
4. Repair damages: If your Halloween mask gets ripped or damaged, make sure to repair it. You can use a suitable adhesive or tape, following the manufacturer’s instructions or seek professional help if needed.
5. Prevent excessive sweating: Excessive sweating can deteriorate the mask over time. Consider wearing a thin layer of cloth or a sweatband underneath the mask to absorb sweat and extend its lifespan.
By following these tips, you can ensure that your Halloween mask remains in good condition for future use. This will not only prolong its lifespan but also enhance your overall Halloween experience.
Frequently Asked Questions
How do I fix a small crease in my Halloween mask?
To fix a small crease in your Halloween mask, you can follow these steps:
- Heat up some water until it is hot but not boiling.
- Soak the mask in the hot water for a few minutes to soften the material.
- Take the mask out of the hot water and immediately place it in icy water to cool and re-shape it.
- For maintaining the shape, you can attach the mask to a round object or use a cheap shadow box.
My Halloween mask has a misshapen dome, how can I fix it?
To fix a misshapen dome in your Halloween mask, you can try the following method:
- Soak the vinyl mask in hot water for a few minutes to make it pliable.
- Remove the mask from the hot water and place it in icy water to quickly cool and set the new shape.
- While it is cooling, attach the mask to a round object or use a cheap shadow box to maintain its shape.
- Once cooled, the mask should regain its round shape and fit properly.
How can I reshape a Halloween mask made by Ghoulish Productions?
If you have a Halloween mask made by Ghoulish Productions that needs reshaping, you can follow these steps:
- Heat the mask using a hairdryer for about 15 minutes, focusing on the problem areas like the nose and mouth.
- While heating, use a ruler or any straight object to keep the nose straight.
- After heating, stuff the mask with paper or use a styrofoam head to give it a fuller shape.
- Leave the mask to cool while still stuffed, allowing it to take on its new shape.
- Once cooled, the mask should have a dramatic difference, with the bent shape corrected.
What should I do if my Halloween mask has a warped curvature?
If your Halloween mask has a warped curvature, you can try the following steps to fix it:
- Heat the mask using a hairdryer, focusing on the problem areas.
- While heating, gently shape the mask with your hands to correct the warped curvature.
- If needed, use a ruler or any straight object to keep the desired shape during the heating process.
- After heating, allow the mask to cool naturally, holding the desired shape.
- In the worst-case scenario, if the mask doesn’t hold the shape, you may need to repeat the heating and shaping process multiple times.
How can I fix a bent shape in a Halloween mask, like the Pit Witch mask?
If your Halloween mask, such as the Pit Witch mask, has a bent shape, you can follow these steps to fix it:
- Stuff the mask with paper or use a styrofoam head to give it a fuller shape.
- Heat the mask with a hairdryer for about 15 minutes, focusing on the problem areas.
- Gently shape the mask with your hands while heating to correct the bent shape.
- Use a ruler or any straight object to maintain the desired shape, particularly for the nose.
- Allow the mask to cool while still stuffed to let it take on its new shape.
- Once cooled, the mask should have the squished face and bent shape corrected.


