Creating Halloween tombstones can be a fun and spooky DIY project to enhance your Halloween decorations. Making your own tombstones allows you to customize the design and add a personalized touch to your Halloween display. With the right materials and a step-by-step guide, you can easily create realistic-looking tombstones that will impress your trick-or-treaters.
In this article, we will discuss the materials needed for making Halloween tombstones, provide a detailed step-by-step guide, share tips and tricks for creating realistic tombstones, explore alternative methods, and offer decorating ideas to make your Halloween tombstones stand out.
Get ready to unleash your creativity and transform your outdoor space into a hauntingly realistic graveyard this Halloween season.
1. Halloween tombstones can be made using foam board or wood, cutting tools, paint, brushes, and decorative accessories.
2. The step-by-step guide includes designing the shape and size, cutting and shaping the tombstone, adding text and designs, painting and weathering it, and adding decorative accessories.
3. Tips and tricks can help create realistic Halloween tombstones, while alternative methods include using styrofoam or cardboard. Decorating ideas can add extra flair to the tombstones.
Materials Needed for Making Halloween Tombstones
When it comes to creating spooky Halloween tombstones, having the right materials is key. In this section, we’ll uncover the essential ingredients you’ll need to bring your haunted graveyard to life. From foam board or wood to cutting tools and paint, we’ll explore the must-have items that will help you craft realistic and chilling tombstones. Plus, we’ll dive into the world of decorative accessories, unlocking endless possibilities for customization and adding that extra scare factor. Let’s get ready to make some spine-chilling tombstones!
Foam Board or Wood
The choice of material for making Halloween tombstones is crucial in terms of both durability and appearance. Two commonly utilized materials are foam board and wood.
When it comes to durability, foam boards are less sturdy compared to wood. On the other hand, wood is known for its sturdiness and long-lasting qualities, making it ideal for outdoor conditions.
When it comes to cutting, foam boards can be easily cut using utility knives or foam hole cutters. However, wood requires the use of power tools such as jigsaws or sawzalls for cutting and shaping.
In terms of customization, foam boards are easily carved and shaped to create intricate designs. However, wood allows for even more detailed carving and the addition of extra decorative elements.
When it comes to weather resistance, foam boards are susceptible to water damage and do not hold up well in heavy rain or extreme weather conditions. In contrast, wood can be weatherproofed with varnish or sealant.
In terms of cost, foam boards are more affordable compared to wood. However, wood is pricier but offers higher durability and authenticity.
When choosing between foam board or wood for Halloween tombstones, it is important to consider factors such as durability, ease of cutting, customization options, weather resistance, and budget. Choose the material that best suits your specific needs and preferences.
Cutting Tools
Edited
Cutting Tools
- Utility knife: A sharp utility knife is essential for precise cuts on foam board or wood. It allows for easy shaping and trimming of the tombstone.
- Jigsaw: A jigsaw with a fine-toothed blade can be used to cut out intricate shapes on the tombstone.
- Coping saw: A coping saw is useful for cutting curved or rounded designs on the tombstone.
- X-Acto knife: An X-Acto knife is handy for adding finer details and intricate patterns to the tombstone.
- Scissors: Scissors are useful for cutting smaller decorative accents or trimming excess material.
- Mitre saw: If working with wood, a mitre saw can be used to make precise angled cuts for assembling the tombstone.
- Sandpaper: While not a cutting tool per se, sandpaper is essential for smoothing rough edges and creating a polished finish on the tombstone.
Paint and Brushes
When painting Halloween tombstones, it’s important to have the right materials and techniques for a realistic and spooky effect. High-quality paint, such as acrylic or spray paint, offers good coverage and durability for tombstones. Different sizes of brushes allow for various effects and details. Flat brushes can cover large areas, while fine brushes can add intricate designs or text. By using the right paint and brushes, you can create a chilling and realistic tombstone that adds a spooky touch to your Halloween decorations.
Decorative Accessories
When decorating Halloween tombstones, adding accessories can bring them to life. Here are some ideas to consider:
1. Graveyard Flowers: Use artificial flowers like black roses, blood-red carnations, or wilted blooms to create a spooky atmosphere.
2. Spider Webs: Stretch fake spider webs across the tombstone for an eerie effect.
3. Gothic Fencing: Place miniature gothic-style fences around the tombstones to create a creepy graveyard scene.
4. Skulls and Bones: Scatter plastic skulls and bones near the tombstones to add a macabre touch.
5. Cobwebs: Stretch cotton cobwebs across the tombstone and adorn them with plastic spiders or tiny bats.
6. Candles: Place battery-operated candles or LED tea lights on the tombstone for an atmospheric glow.
7. Grave Markers: Use small wooden stakes or miniature tombstone props with funny or spooky phrases written on them.
8. Halloween Props: Incorporate other Halloween decor like creepy hands reaching out from the ground, rats, or ghosts.
9. Weathering Effects: Apply black or gray paint to give the tombstone an aged or weathered look.
10. Personalization: Add personal touches like the name of a fictional character or spooky quotes to make the tombstone unique.
By using these accessories, you can create a chilling and realistic Halloween graveyard scene for your tombstones.
Step-by-Step Guide on Making Halloween Tombstones
Get ready to bring your spooky Halloween vision to life with our step-by-step guide on making Halloween tombstones! We’ll walk you through each stage of the process, from designing the shape and size to adding text and designs. You’ll also learn how to paint and weather the tombstones for an authentic and eerie look. Plus, we’ll even show you how to add decorative accessories to take your tombstones to the next level of fright! Let’s dive in and transform your Halloween decor into a graveyard masterpiece.
Step 1: Designing the Shape and Size
To begin making Halloween tombstones, the first essential step is to meticulously design their shape and size.
- Commence by determining the overall shape of the tombstone, whether it be rectangular, cross-shaped, or if custom shapes are preferred for an aged and weathered appearance.
- Take into consideration the tombstone’s size, which should be based on its intended location. It is crucial to measure the area where you plan to position it to ensure a proper fit.
- Make decisions regarding any additional design features you wish to include, such as a curved top or ornamental edges, to enhance the character and authenticity of the tombstone.
- Remember to keep in mind the desired theme or style for your Halloween display, whether you prefer a spooky and eerie atmosphere or a more playful one.
- Render a sketch of the design on paper or employ software to visualize the tombstone. Experiment with various shapes and sizes until you are satisfied with the final design.
- Take note of any specific materials required for constructing the tombstone, taking into account its shape and size. These materials may include foam board or wood for the foundational structure.
By diligently following these steps, you will confidently progress to the next stage of creating your Halloween tombstone.
Step 2: Cutting and Shaping the Tombstone
- Measure and mark dimensions for the tombstone on the foam board or wood.
- Carefully cut along the marked lines to shape the tombstone using a sharp tool.
- If using foam board, carve and sculpt the edges of the tombstone for an aged look.
- Add decorative details like rounded tops, pointed tips, or unique shapes to make each tombstone distinct.
- Smooth rough surfaces and create a polished finish using sandpaper.
- Create additional texture on the tombstone by carving cracks, crevices, or simulated weathering effects with a hot wire cutter.
In 2019, I made Halloween tombstones for our yard. Following a guide, I measured and cut foam board into different shapes. I used a utility knife to shape the edges for an aged look. A hot wire cutter was used to add cracks and crevices. The end result was realistic tombstones that added a creepy atmosphere to our Halloween display. The cutting and shaping process required patience and attention to detail, but it was worth it.
Step 3: Adding Text and Designs
- Choose the type of text and design for your Halloween tombstone: spooky phrase, funny message, or ghostly character’s name.
- Lightly sketch the text and design on the tombstone using a pencil. This serves as a guide for the final details.
- Carefully trace over the sketched text and design using acrylic paint or a permanent marker. Apply steady pressure for clear and bold lines.
- Enhance the tombstone’s appearance with additional details like cracks, moss, or weathering effects.
- Allow the paint or marker to fully dry before proceeding to the next step.
For my Halloween tombstone, I chose a spooky message: “Enter if you dare.” I sketched it out with a ghostly apparition above. Using black acrylic paint, I traced over the sketch to make the letters and design stand out against the gray surface. To give it an aged and weathered look, I added cracks and subtle moss accents. The finished tombstone looked terrifyingly realistic, sending chills down the spines of anyone who approached it on Halloween night. It was a hit with the neighborhood kids and became a memorable decoration for years to come.
Step 4: Painting and Weathering the Tombstone
In step 4, follow these instructions to paint and weather the tombstone for a realistic and aged appearance. Start by cleaning the tombstone thoroughly, ensuring it is dry and free from any dust or debris.
Then, use either a brush or spray paint to apply a base coat of gray or brown paint onto the tombstone. This foundation color will serve as the starting point.
After allowing the base coat to dry, take a small amount of black or dark gray paint and mix it with water to create a thin wash. Next, use a brush to apply the wash onto the tombstone, focusing on the recessed areas and corners. This will add depth and create shadows, enhancing the overall look.
Allow the wash to partially dry, and then take a damp cloth or sponge to gently rub and remove some of the wash. This technique will produce a weathered and worn appearance, giving the tombstone an authentic feel.
For added realism, use a sponge or stippling brush to apply a lighter shade of gray or brown paint. This will create texture and simulate the effect of aging or moss on the tombstone.
To enhance the weathered effect, lightly sand the edges and surfaces of the tombstone using fine sandpaper or a sanding sponge.
If desired, you can add additional details such as cracks, moss, or faux aging using acrylic paints or specialized weathering products.
Ensure the final paintwork is completely dry before proceeding to the next step of adding decorative accessories to the tombstone.
Step 5: Adding Decorative Accessories
- Select decorative accessories that enhance the Halloween tombstones, like plastic spiders, fake cobwebs, or small skulls, to create a spooky atmosphere.
- Add decorative moss or leaves around the base of the tombstone for a realistic and aged appearance that adds to the overall effect.
- For a weathered and haunting effect, attach faux chains or ropes to the tombstone.
- Make certain elements of the tombstone glow at night by applying glow-in-the-dark paint or using phosphorescent stickers.
- Create an eerie and mystical ambiance by adding LED lights inside the tombstone.
- Add an extra creepy touch by sticking decorative insect or bat decals to the tombstone.
- Gives the tombstone a mournful and somber atmosphere by including dried flowers or dark-colored roses.
- Create a haunting glow by placing an old lantern or candle holder near the tombstone.
- Add personalized accessories like small photos or trinkets that relate to the deceased character on the tombstone for a unique touch.
Tips and Tricks for Creating Realistic Halloween Tombstones
– When crafting your Halloween tombstones, it’s important to choose durable materials such as foam or plywood. This ensures that your tombstones will withstand the entire Halloween season.
– To achieve an authentic weathered look, roughen the surface of your tombstone using sandpaper or a wire brush. This will give it a textured appearance.
– For spooky designs or epitaphs, you can either use stencils or try your hand at freehand techniques to carve them onto the tombstone.
– To create an aged effect, start by applying a base coat of gray or black spray paint. Then, using shades of brown and green, use the dry brushing technique to add aged details.
– To further enhance the realism of your tombstone, consider adding moss or lichen to it. Positioning the tombstone slightly tilted will help convey a sense of age and decay.
Fact: It’s interesting to note that tombstones have a long history and can be traced back to ancient civilizations like the Egyptians and Greeks.
Alternative Methods for Making Halloween Tombstones
Unleash your creativity this Halloween with alternative methods for making spooky tombstones! In this section, we’ll explore two exciting options: Styrofoam tombstones and cardboard tombstones. Discover the tricks and techniques to bring your graveyard to life using these materials. No need to stick to the traditional methods – let’s dive into the world of DIY tombstones and make this Halloween truly memorable!
Styrofoam Tombstones
Styrofoam tombstones, also known as Styrofoam Tombstones, are an ideal choice for creating spooky and captivating Halloween decorations. The versatility of these tombstones allows for easy handling and endless possibilities for creativity. To effectively work with Styrofoam tombstones, consider the following key points:
1. Materials: To craft stylish and durable Styrofoam tombstones, gather essential materials such as high-quality Styrofoam sheets or blocks, a reliable carving tool like a utility knife or foam cutter, sandpaper for smoothing rough edges, and vibrant acrylic paint for adding color and intricate details.
2. Design: Before commencing the cutting process, carefully decide on the shape and dimensions of your tombstone. You can opt for traditional rectangular shapes or unleash your imagination with distinctive designs like Gothic arches or crosses. It is advisable to sketch your chosen design on the Styrofoam surface before initiating the carving process.
3. Carving: Utilize the sharp carving tool with utmost care and precision to effectively cut and shape the Styrofoam. Begin with rough cuts and gradually refine the shape, ensuring the creation of clean and precise lines. Take your time to meticulously achieve the desired outcome.
4. Text and Designs: Utilize the carving tool to intricately add text and designs to your tombstone. Opt for classic engravings like “R.I.P” or experiment with eerie phrases. You can also incorporate cracks or decorative motifs such as skulls or bats to enhance the haunting allure of your creation.
5. Painting: Once the carving process is complete, breathe life into your Styrofoam tombstone by using acrylic paint. Apply a base coat and effectively achieve weathering effects by incorporating darker shades and employing dry brushing techniques. To protect your masterpiece, seal the paint with a clear sealant.
6. Decorative Accessories: Elevate the overall spooky ambiance of your Halloween display by embellishing the tombstone with additional decorative accessories. Consider incorporating faux ivy, plastic spiders, or cobwebs to heighten the eerie atmosphere and captivate viewers.
By following these step-by-step instructions, you can successfully create realistic and spine-chilling Styrofoam tombstones, ultimately transforming your Halloween decorations into a bone-chilling spectacle.
Cardboard Tombstones
Making Halloween tombstones with cardboard is a more affordable and accessible option. Here are the steps to follow:
- Design the shape and size: Draw the cardboard tombstone shape and then cut it out.
- Cut and shape the tombstone: Use a utility knife to cut out the cardboard tombstone shape. Add rounded corners or pointed tops if desired.
- Add text and designs: Use paint or markers to add spooky messages or creepy designs to the cardboard tombstone.
- Paint and weather the tombstone: Apply a base coat of paint and then add layers to create a weathered look on the cardboard tombstone. Use darker colors or mix in gray or black for a worn appearance.
- Add decorative accessories: Enhance the cardboard tombstone with fake moss, cobwebs, or plastic spiders for a more realistic effect.
Did you know that cardboard tombstones can be easily recycled after Halloween? Be sure to dispose of them properly for a more environmentally-friendly celebration.
Decorating Ideas for Halloween Tombstones
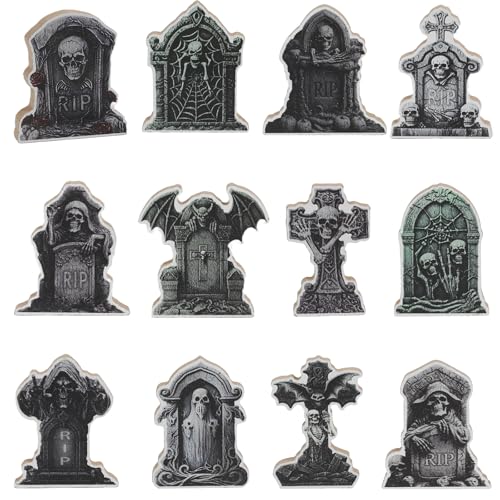
When it comes to decorating Halloween tombstones, there are several ideas you can explore. One option is to use realistic-looking foam or plastic tombstones strategically placed in your yard to create a creepy graveyard scene. To add a spooky touch, you can paint or carve eerie messages or symbols, such as “Rest in Peace” or ghostly figures. For a weathered look, incorporating moss or fake cobwebs can be a great idea. To enhance the eerie atmosphere, you can place fake skeletons or skeletal hands emerging from the ground. Illuminating the tombstones with spotlights or LED lights will create spooky shadows, adding to the overall effect. Adding artificial flowers or wreaths can bring some color and festive vibes to the scene. Another option is to create a haunted entrance by lining the path with flickering candles or jack-o’-lanterns. Hanging a ghost or bat from a tree branch will further enhance the eerie ambiance. By incorporating these decorating ideas, you can transform your yard into a chilling graveyard that will give your neighbors a fright.
Frequently Asked Questions
How can I make DIY Halloween tombstones for decorations?
To make DIY Halloween tombstones, you can follow these steps:
- Draw the shape of the tombstone on a styrofoam sheet and cut it out using a utility knife.
- Cut out the border from craft foam and glue it onto the tombstone.
- Cut out lettering and designs using different methods like freehand drawing, stencils, foam letters, or a Cricut machine.
- Glue the lettering and designs onto the tombstone using hot glue.
- Apply a protective coating with Mod Podge to prevent melting during spray painting.
- Spray paint the tombstone with stone texture spray and primer.
- Add details like outlined lettering with a black marker and shadow effect with another coat of stone spray.
- Protect the tombstone with a clear spray topcoat.
- Set up the tombstone using heavy gauge wire bent into a U-shape and taped to the back.
- Decorate the tombstones with props like LED lanterns, zombie hands, and fake moss.
What are some funny tombstone sayings I can use?
Some funny tombstone sayings that you can use include:
- “I told you I was sick!”
- “Here lies an atheist, all dressed up and nowhere to go.”
- “I’m just resting my eyes.”
- “I’m not dead yet, but the night is young.”
- “I finally found a WiFi signal.”
How can I make the tombstones spookier?
To make the tombstones spookier, you can try the following:
- Use cleverly written tombstone sayings (epitaphs) that evoke a sense of eeriness or mystery.
- Add spooky but not scary scenes or images to the tombstones with craft foam or other materials.
- Create a 3D look on the tombstones by layering different materials or using textured paint.
- Incorporate props like a giant spider or fake cobwebs to enhance the haunted house theme.
What alternative materials can I use to make DIY Halloween tombstones?
If you don’t have access to craft store materials, you can try these alternative materials:
- Instead of using craft foam, you can use cardboard or foam board.
- For the stone texture spray, you can use leftover spray paint in gray or black.
- If you don’t have access to Mod Podge, you can try using clear glue or adhesive spray.
- Instead of scrap leather, you can use strips of fabric or textured paper for added detail.
How can I protect the tombstone from weather damage?
To protect the tombstone from weather damage, you can follow these steps:
- After completing the painting and decoration process, apply a clear spray topcoat to seal the surface.
- Make sure to cover all the surfaces of the tombstone with the topcoat, including the lettering and designs.
- Allow the topcoat to dry completely before placing the tombstone outdoors.
- If possible, move the tombstone indoors during severe weather conditions to prevent potential damage.
Where can I find more DIY Halloween decoration ideas?
You can find more DIY Halloween decoration ideas by searching online on crafting websites, blogs, or social media platforms. There are many resources available that provide step-by-step tutorials, inspiration, and creative ideas for Halloween decorations.
What is the best way to write tombstone sayings (epitaphs)?
The best way to write tombstone sayings (epitaphs) is to think about the desired tone or theme for your Halloween decorations. You can aim for spooky, funny, mysterious, or even poetic. Consider the character or personality you want to portray with the epitaphs and use language that evokes the Halloween spirit. Get creative and have fun with the process!


